Highlights are the brightest elements in the photograph. Shadows are the darker elements in the photograph.
When taking images it is quite easy to point and shoot. But are you aware of the surroundings? The lighting conditions? The colours? You might be wondering why this is important, we all know by now that shooting in the dark is pretty difficult without the correct kit, but are you aware that shooting in the sunlight can post just as much of a challenge?
Ideally the best time to shoot outdoors is actually when it’s overcast. You haven’t got to worry about over exposing or under exposing the subject, that is depending where you are shooting. Maybe in a woodland you may need a bit of sunlight to lighten up the scene, but when in an open area then that overcast can be your friend.

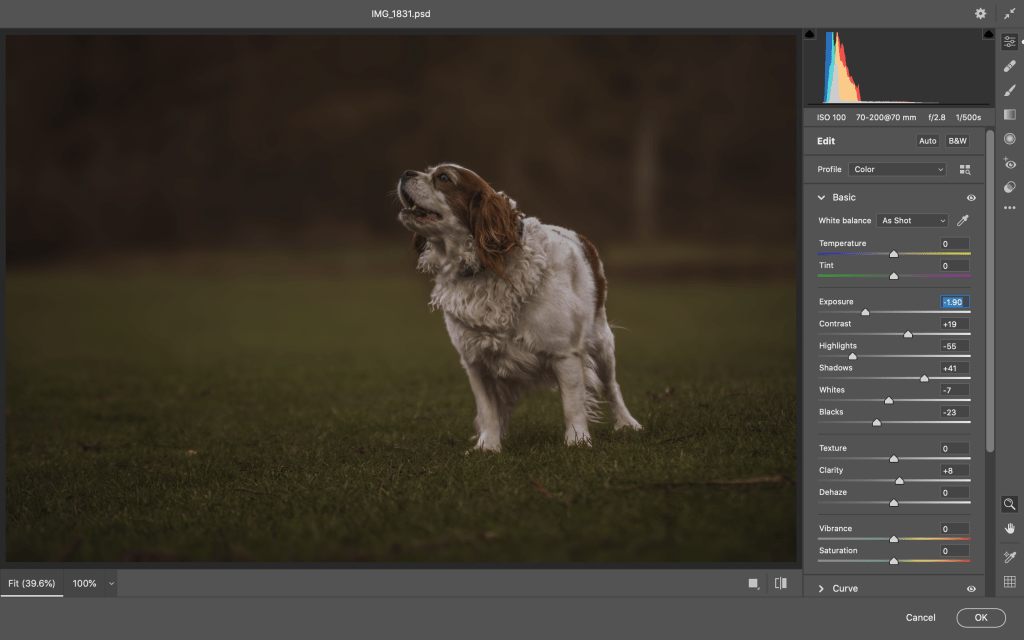
Take example 1, above. This image was taken during an overcast in an open space. The whites on the animal contrasted beautifully and were not blown out. How can you tell this in editing? Except for the obvious fact there are no non-detailed whites in this image, you will also find on the final image posted above there are in fact no ‘blacks’ and the image has actually been flattened curve for the shadow to give it a more matte look. Therefore the histogram does in fact look like this:

The empty area on the left of the histogram is the ‘blacks’ this means there is no black detail. In moderation that is fine as it can make the image seem more interesting depending on the subject you are shooting. This does not mean the image is under-exposed. On the right side of the histogram, there is a small amount of lost detail but not massively and no details are lost. It is important to also note that the ideal histogram looks kind of like a mountain. Providing there is no spike in either side of the subject the image will not be over-exposed or under-exposed (Look at the grey/neutral colour on the histogram).
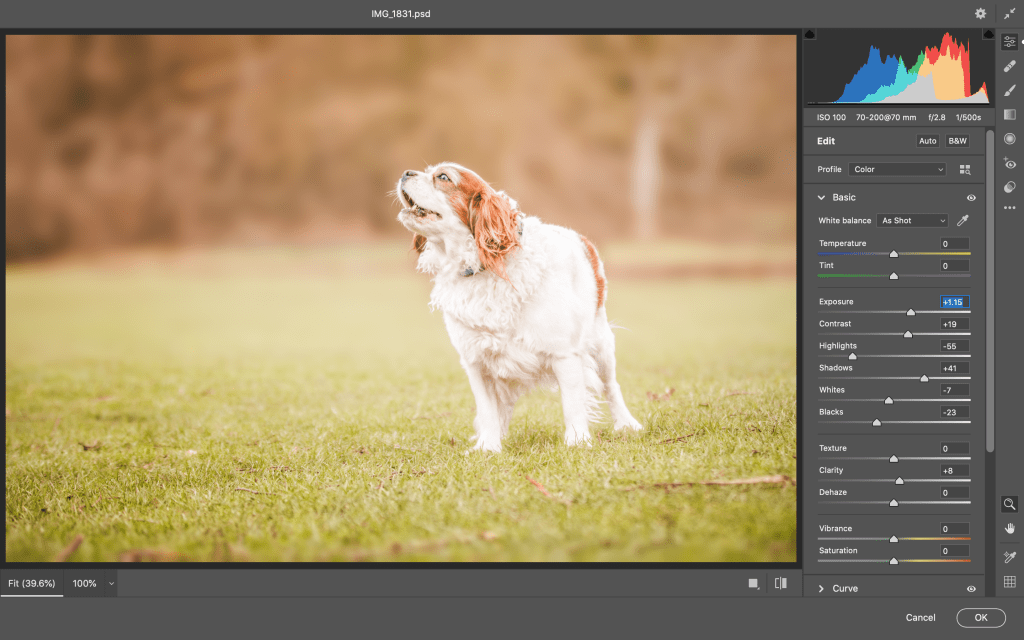
As you can see in the histogram and image in the above image of example 2, you will notice the dark is dark and moody. The image is under exposed and it’s losing details. It looks moody and miserable and nothing is catching the eye. This is not good and not what you would be looking for when editing and taking images.
In Example 3 above, you can see now that the image is over-exposed now. The white details are being lost and attention is being taken from the face of the dog to the bright highlights on the back. You have lost too much detail here and if this was your image taken straight from the camera you will struggle to bring the detail back.
If you are like me and didn’t take much notice to histograms until recently, sometimes a simple looking at the image and if something looks a bit over-exposed or under exposed is easy to tell. For example, in the below image, whilst I really enjoyed the image itself, what really let me down was the highlights. No amount of editing could remove it as it was there as standard and as I shot in auto I didn’t really have that flexibility to avoid this whereas I could have in manual.
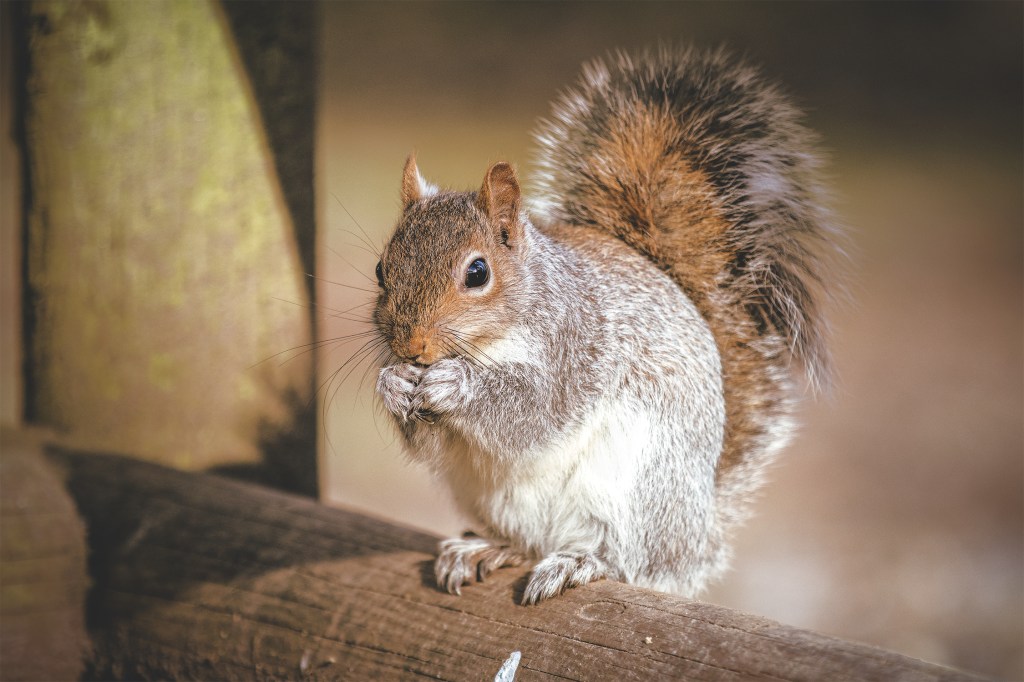
As you can see the highlights in the leg and the neck area are extremely bright and my eyes draw to there first rather than that the face of the squirrel. This detail has been lost and unfortunately unable to bring it back out without deep editing, cloning and so on. It is my belief that in many situations it’s easier to shoot an under-exposed image than to edit an over-exposed image. This is because generally most over exposed images you have lost that detail. It doesn’t exist. With under exposed image I have personally found it be easier to bring back those details… but the consequence of doing this is noise, which I will touch onto in a later blog.
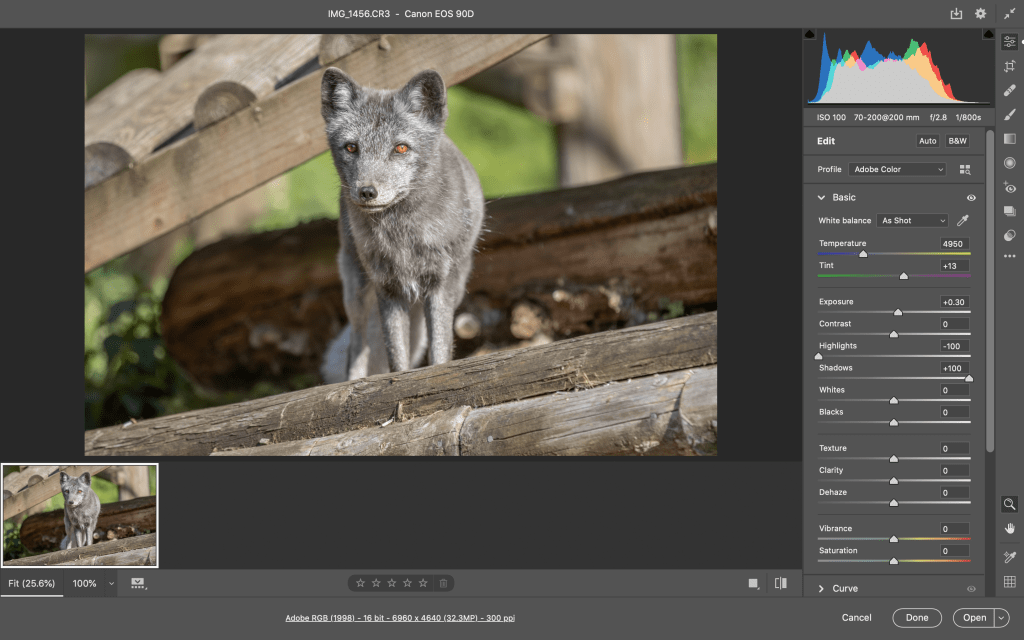
Moving on now, even if your image seems OK but you have shot in lighting conditions quite difficult, take this image of an arctic fox in the summer for example. The lighting conditions are quite harsh. The shadows are blown out on the eyes and in the background, and some areas of the face are over-exposed. This image is an example of an easy fix.
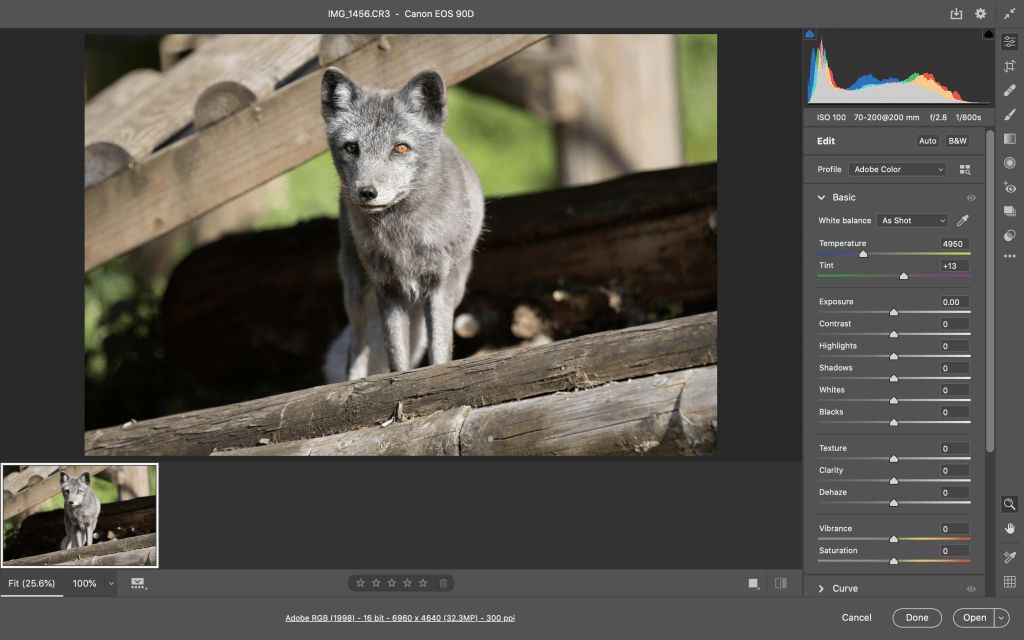
All I had to do was increase the exposure a little bit. Only a tiny bit as it was quite a bright image and we don’t want to over-expose the image as a whole. Then I had to lower the Highlights & Increase the shadows as seen by image below. Now you can see the image is much better balanced out and the histogram is more like that mountain that I mentioned previously. This is almost an ideal exposure for your images. The image also looks less flat as there is more to see and you are now able to see more detail within the image.
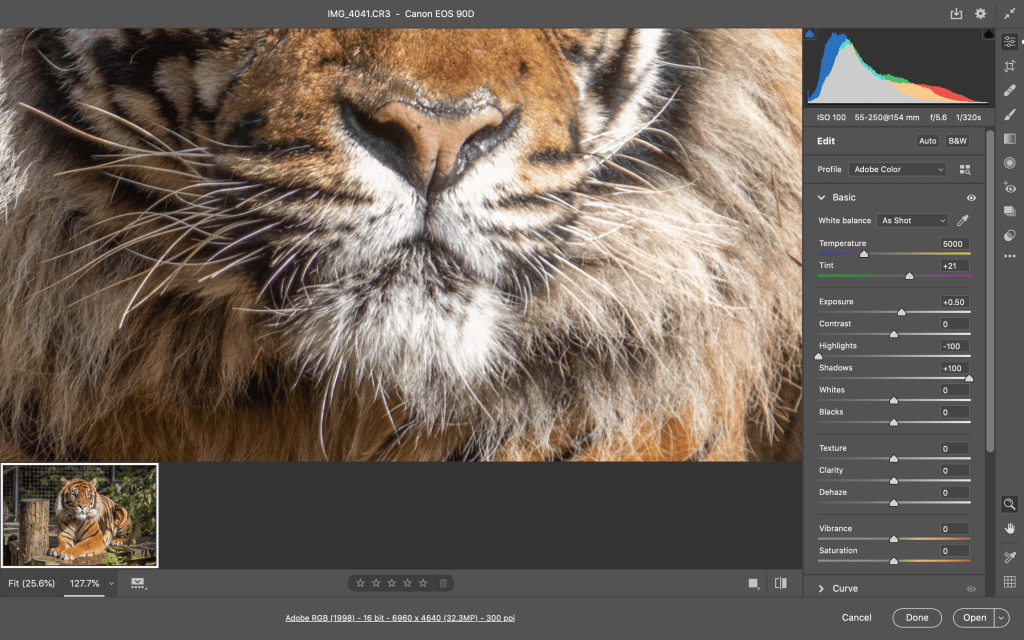
On the next subject, due to the lighting conditions, although similar, were much brighter, it left me in a difficult situation in which the exposure cannot be saved. The are harsh highlights and harsh shadows. Even after adjusting them, unfortunately on the mouth details the exposure was far too bright that details were strongly lost.
Although the difference is pretty much night and day, if we zoom in on the mouth you will see where detail is lost. This can be amended with brushing but can be a very time consuming job and would be quite challenging to do if you are a beginner. in some cases you can get away with this. Also, in this situation I would suggest bringing down the whites. You will find the overall image may become darker. In post I would then suggest you manually edit and mess with masking to help bring the original colour back. Sharpening and denoising the image can then help give it a more naturalistic look.
Overall it’s important to check your image out before posting. A useful tip I recently learn is to flip your image then see where your eyes go to first. If they go to all but your main subject then there may be attention you need to pay to that area to adjust so your eyes are instantly going to the main subject itself.
My final example below is another example of harsh lighting.
Where do your eyes go to? Swipe to see where the attention is being distracted!


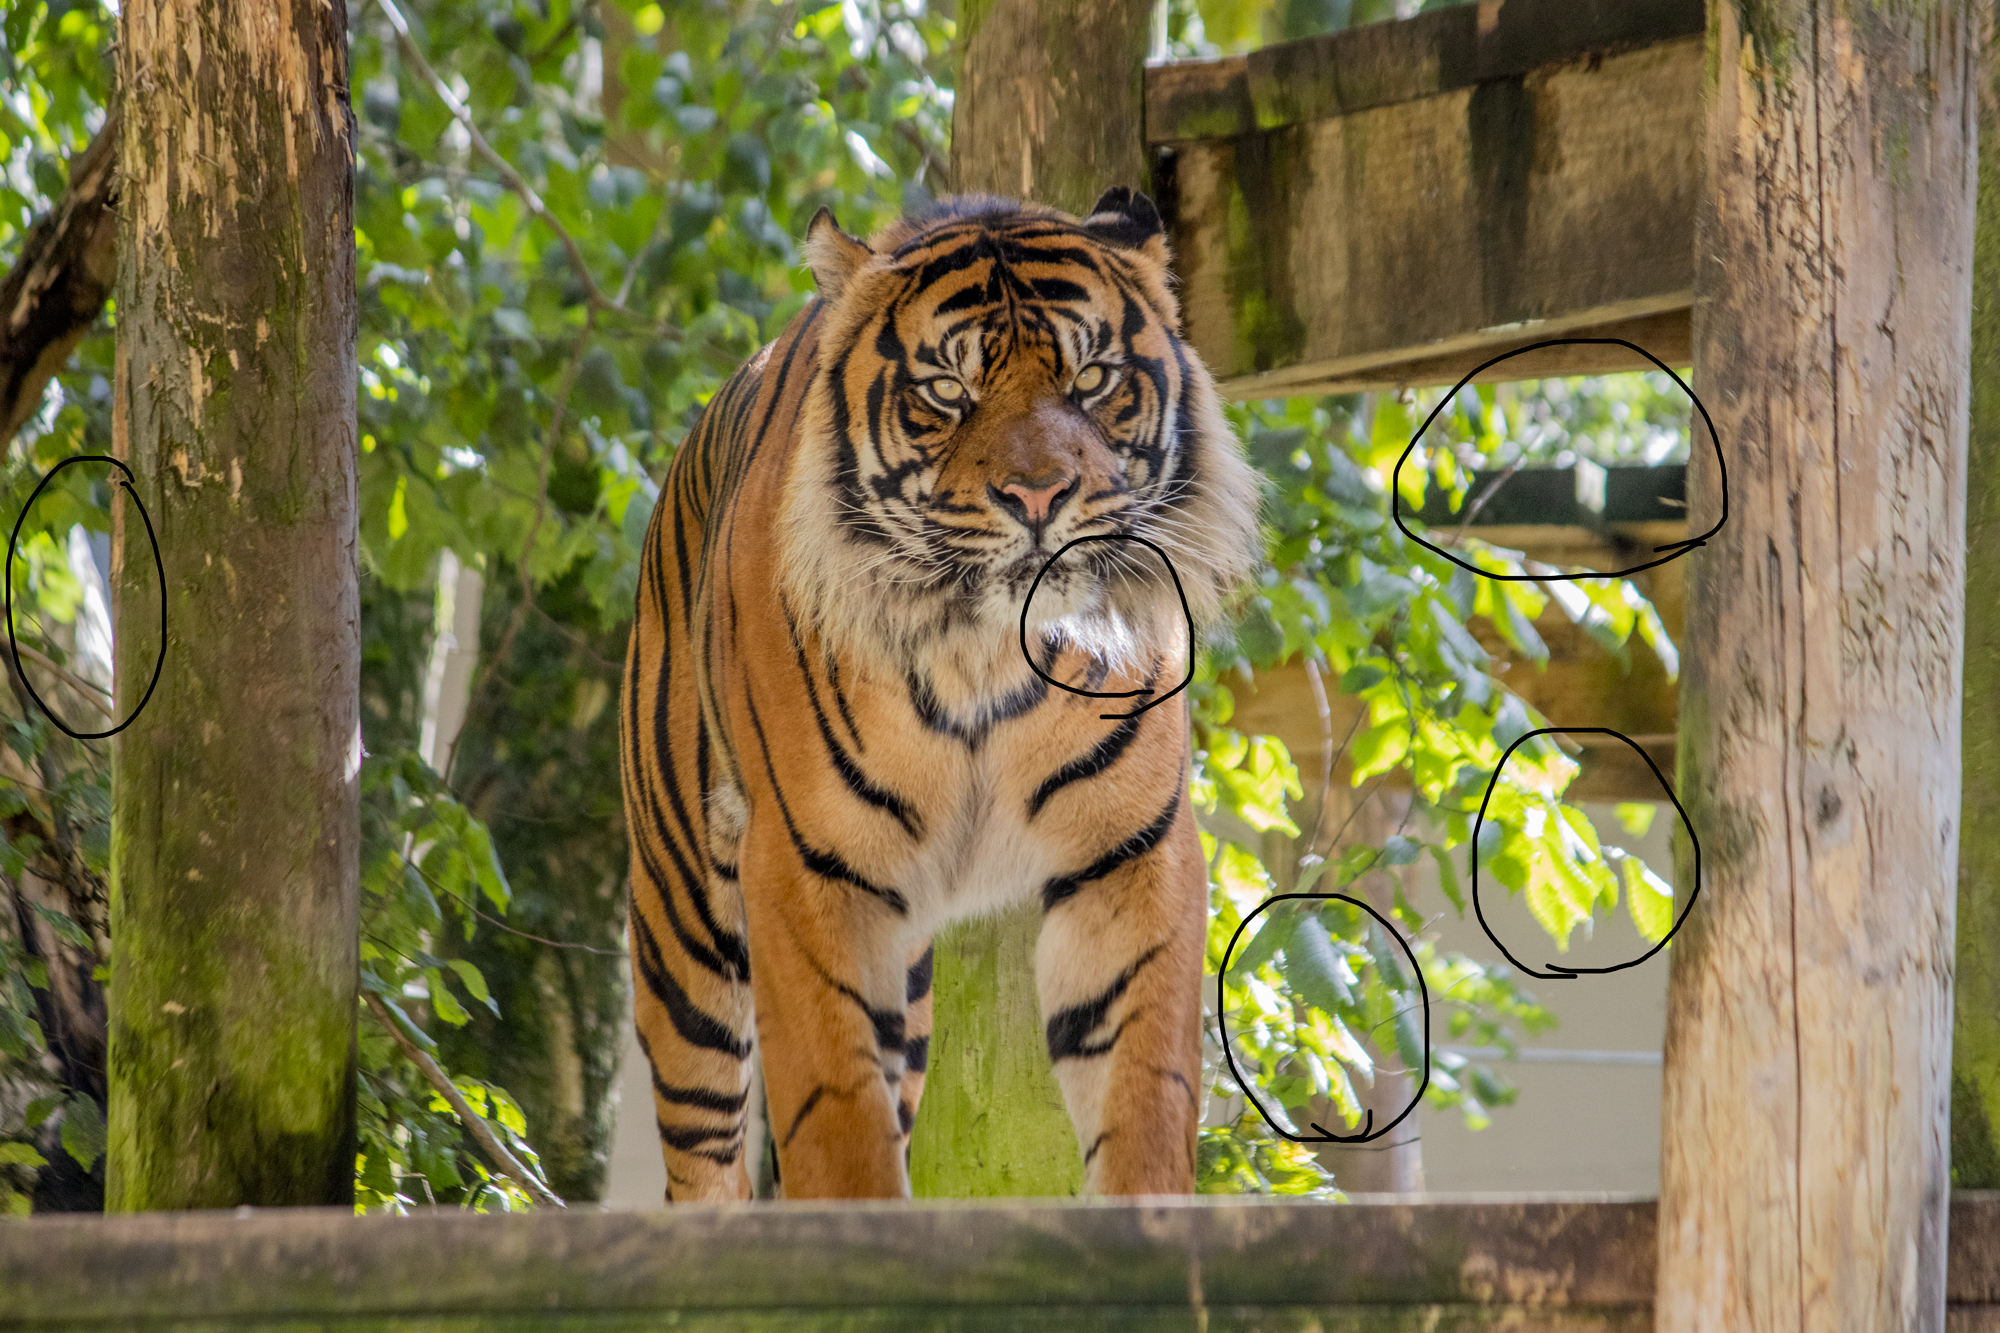
It is always a useful tool to try and brush these out. In this situation it would be easier to find tools to either clone out the highlights, blur it, replace the background. Or in some way alter the background ot get rid of the highlights. In terms of the fur around the face it would be easiest to clone stamp on this too using similar areas of the tigers face or fur.
